Showing posts with label dessert. Show all posts

Wednesday, 31 August 2011

Kaya ~ Coconut Jam


The simple best food from childhood ~ Kaya
My Mum (or Mother, that is how we addressed her nowadays, not quite sure how it evolves. We used to call her "Ma") used to make this at home. I didn't really care how she makes it or what ingredients she uses then. Because, I know the supply is always endless. Mother never failed to make sure the jar is always full. Ah..... Mother....... 

Now, since I am not living in Malaysia nor with Mother anymore. The craving for this particular simple jam has driven me to look the recipe up and taken up the challenge... again. I tried making it about 8 years ago , it turned out like scrambled eggs. I don't dare to make another attempt until now, the cravings is just too much to handle!!!!

This recipe requires patience, LOTS of patience. You need to be by it's side, keeping and eye and nurturing it with your wooden spoon or spatula in a circular motion. I strongly advice being extra nice to your children or partner when you are making it, so you get someone to take over from time to time :-)

Kaya on double broiler
Kaya
6 eggs
250gm sugar (I used brown caster sugar coz I like my kaya brown)
1 can coconut milk, about 400ml
Pandan Leaves (bundle them and up and tie a knot)

How to:
Beat the eggs
Add sugar, mix till sugar dissolve
Add coconut milk, mix well
Strain mixture through a sieve
Let the bubbles in the mixture setteled and strained mixture in a heat proof dish
Put in the pandan leaves
Cook the kaya mixture in a double boiler on medium heat.
Stir the mixture constantly (It took me about 90 min to get to the consistantcy I want), you might want to have a book by you, or utilize those who want a share in eating.

Note:
- I used an electric mixer to mix every up. You can always just use a spatula to get some exercise :-P
- I sieve the mixture to make sure there is no lumps or particles. This help with the smooth texture
- Make sure there is minimal bubbles in the mixture before you cook it to get smooth texture
- Make sure your mixture pot is not touching any water from the bottom pot. If not the mixture will not be smooth
- You will need to stir the mixture constantly in order to get the silky smooth texture.
- Serve with plain crackers, bread or toast, glutenous rice or anything that tickle your fancy, really.


Tuesday, 23 August 2011

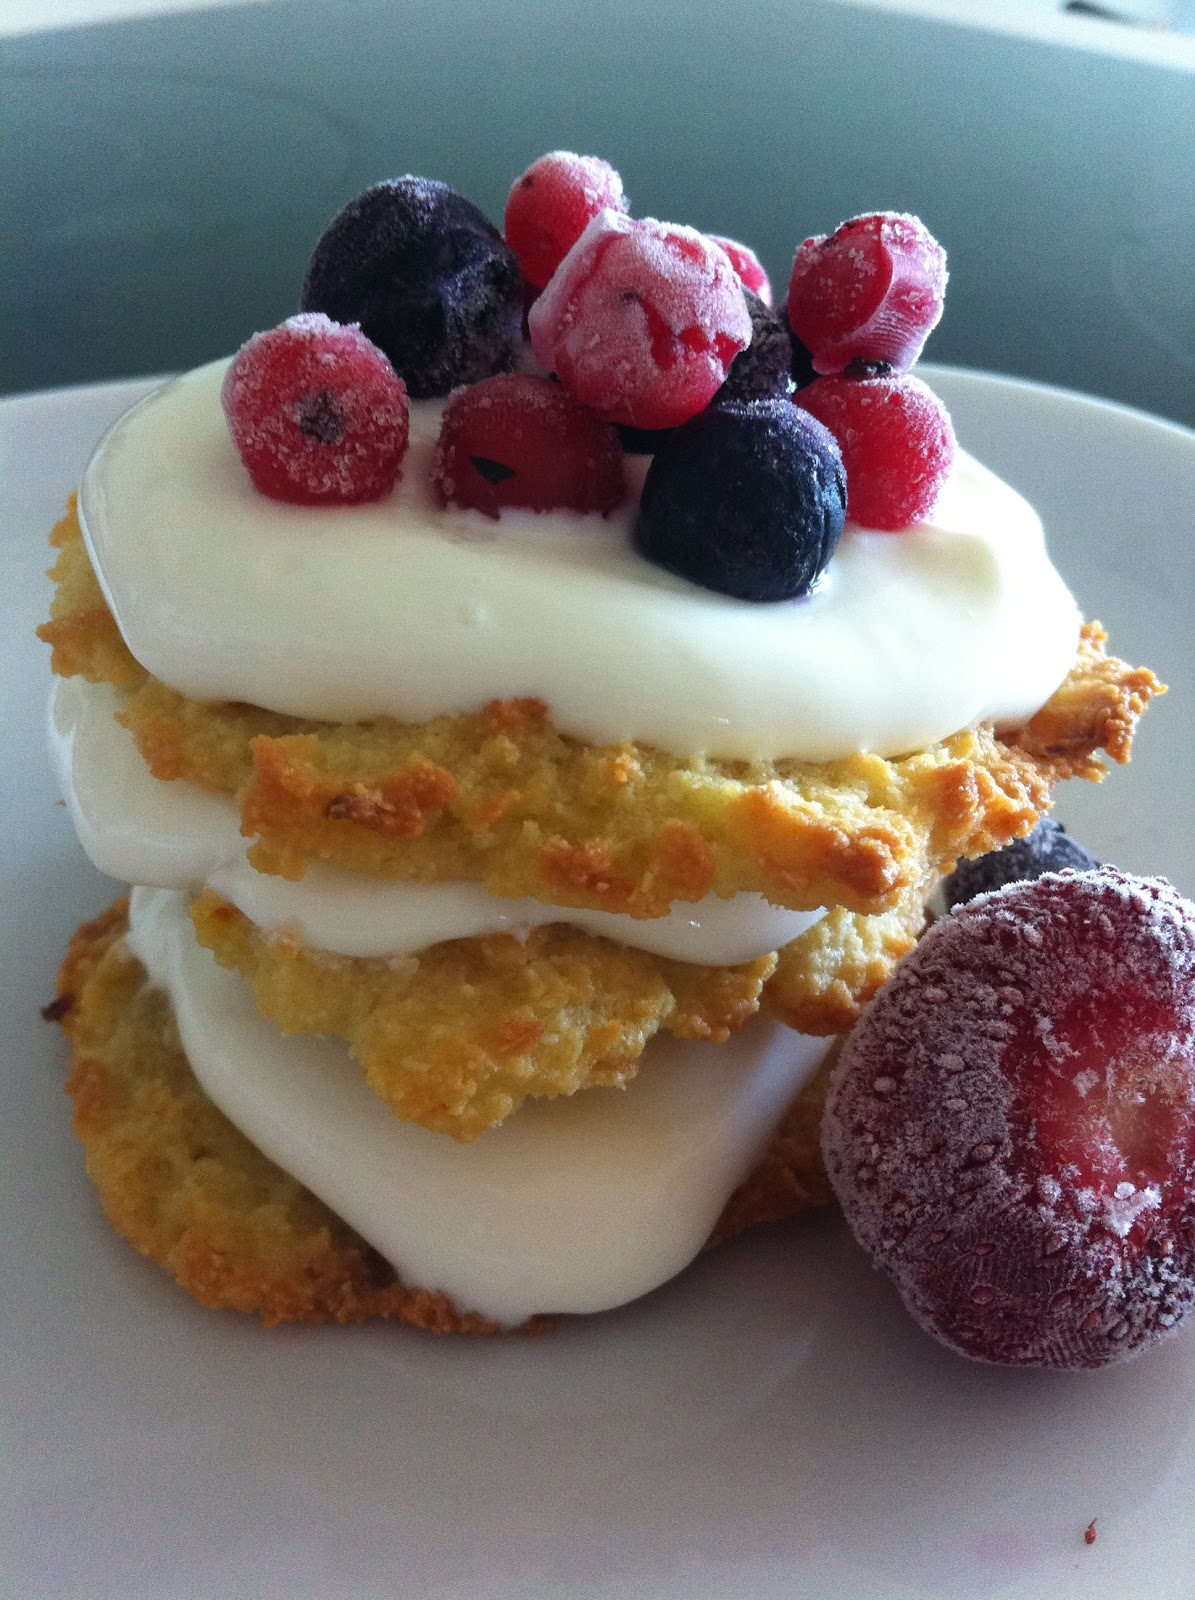
Almond Crisp

My LCHF version
 
 
This recipe adapted from My Little Space. It's simple to make, beautiful to look at & amazingly versatile. I made an original batch served them to the neighbour and they were gone in no time! 
 
When we begin our LCHF diet (we still are), I adapted some ingredients so we can enjoy them as well.

LCHF ingredients are in brackets.
The original Almond Crisps

Almond Crisp
90gm all purpose flour (90gm almond meal)
100gm sugar (6tbsp Splenda)
60gm butter, melted
2 egg whites (roughly about 70gm), lightly beaten
1/4 tsp almond essence ( I used vanilla essence)
some almond flakes
 
Cream
250ml double cream
1/4 tsp vanilla essence
1/4 tsp lemon juice

Method :

- combine flour, melted butter and beaten egg white together and mix well.
- keep the mixture cover and leave to rest for an hour.
- finally, drop a spoon of batter onto baking tray and spread mixture to a round 5-6cm diameter.
- Add vanilla essence and lemon juice to double cream and whipped till it reaches soft peak
 
 
Note: 
- This recipe makes only about 8-10 almond crisp. So if you would like to have just bite size, make the diameter of the cookies smaller
- I make them into mille- feuille like, layering the crisps in between double cream and berries 

Monday, 22 August 2011

LCHF Rapsberry creme de la creme

Side view of my layering creme de la creme. Don't they just look oh so yum!


Since we started our Low Carb High Fat (LCHF)LCHF diet, we have been looking high and low for something to satisfy our sweets craving.You cannot imagine how excited I was when I came across this one while watching Donna Hay "Fast, Fresh, Simple". I literally jumping up and down like a hyper kids who had just found the hidden Easter eggs!!!
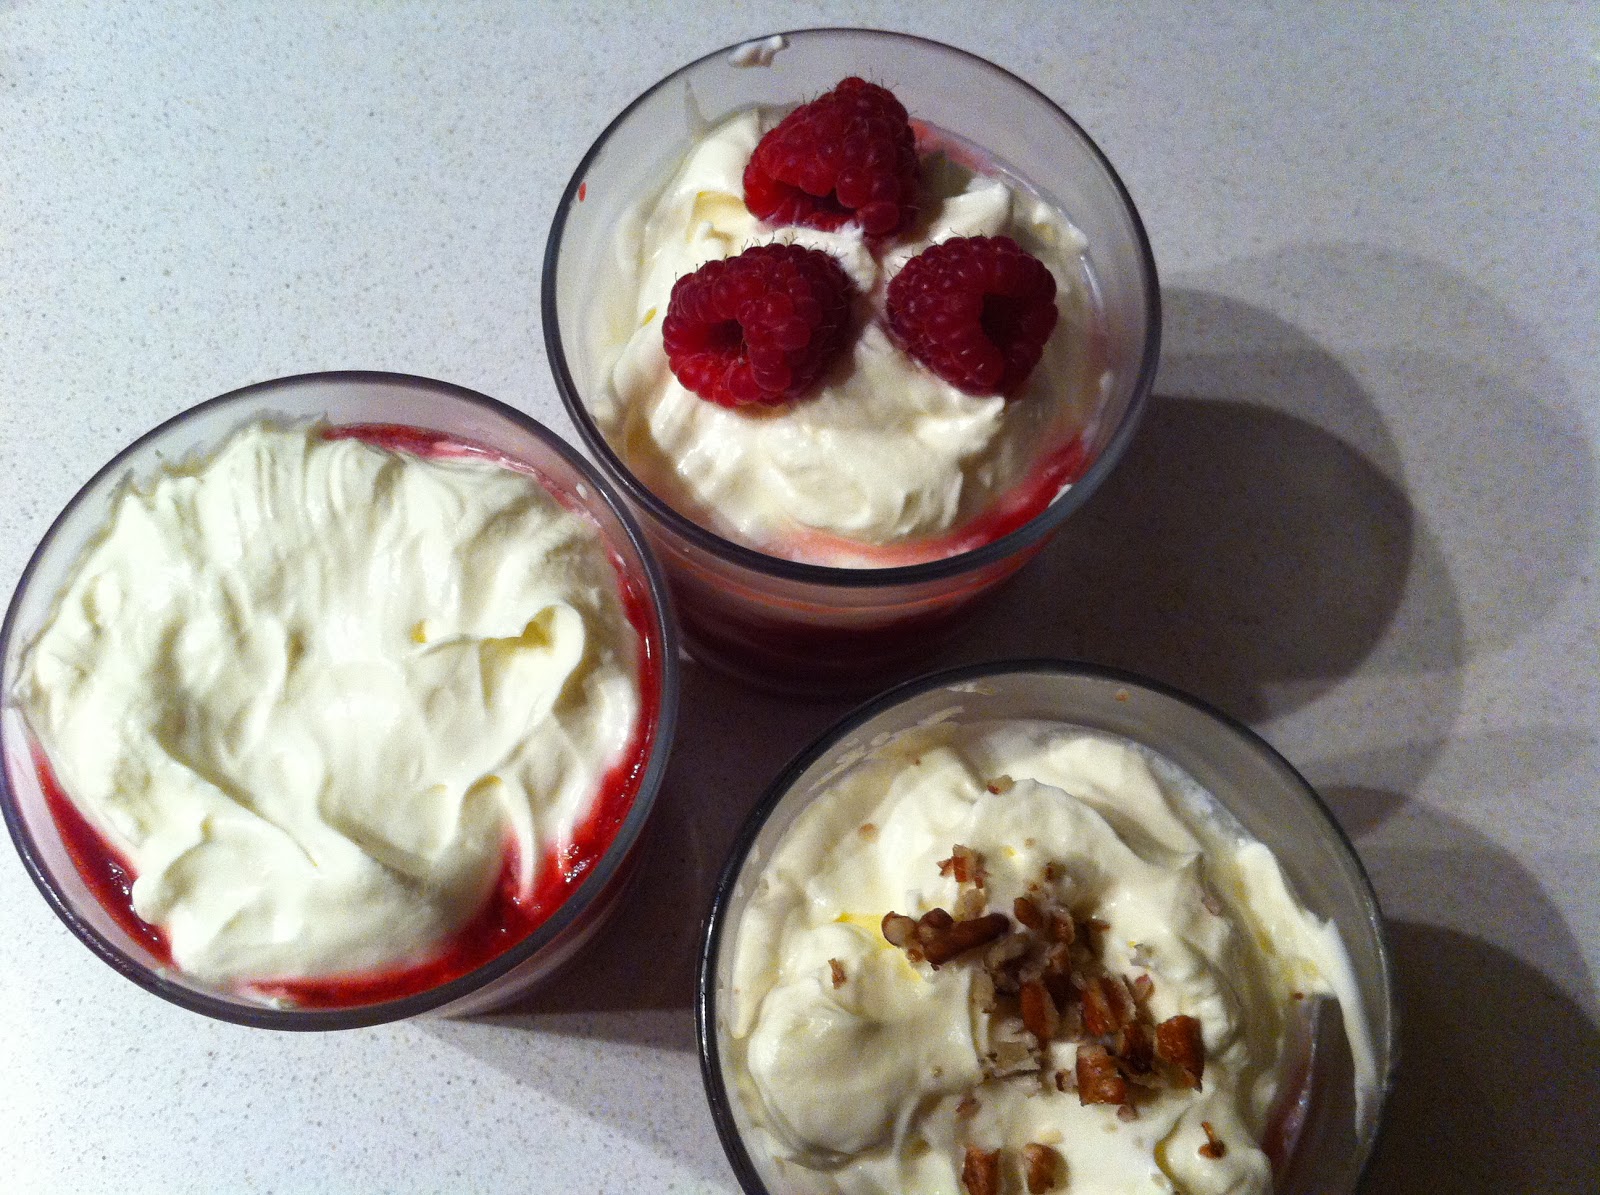
Different topping: plain, fruits & nuts


Raspberry Jelly
300g raspberry (fresh or frozen)
6tbsp Splenda (75g caster sugar)

Cream de la Cream
420g Greek yogurt
250ml double cream
1tsp Splenda (2tbsp caster sugar)
1 tsp vanilla extract
Raspberry Cream de la Cream


How to:
Place respberries and sugar in a saucepan over high heat and simmer. Stir constantly in the beginning so the sugar does not burn at the bottom at the pan. One the mixture is thicken (almost like runny jam), remove from heat, cool and spoon mixture into 4 x 250ml glass/ dishes. Refrigerate until cold.
Raspberry Jelly. I left some whole to add texture


Whisk together the yogurt, cream, sugar and vanilla until thick or what they called soft peak and spoon over the cold raspberry jelly. (I layered mine on my 2nd attempt, they looked even more stunning!) Refrigerate until cold.


Note:
-I saved some jelly for the top so that I can get the raspberry flavour from the very first spoon. Besides, it looks pretty :)
- On my second attempt I layered the jelly and the creme. I also sprinkle some nuts in one and top with fresh raspberries on the other. You can let your imagination runs wild and replace the jelly with any other things like: - chocolate sauce, caramel topping, choc chips, nuts, sprinkles or just fresh fruits.
- I modified this recipe to suite our diet (using sweetener).
- They do taste better after at least 4 hours of chilling. Oh well, I am not know for my patient. These things are out within 20 min in my house.

Monday, 11 April 2011

Sweet Hearts

I used to travel to the Philippines for work. During my last trip (I think that was almost 7 years ago now), I was introduce to these wonderfully decorated sugar cookies. I was instantly drawn by their simpleness and how pretty they look. I got 2 "sunflowers" in lollipop sticks wrapped up with see through cellophane and tied up with a beautiful ribbon. They were for my little princesses waiting patiently for me to get home. I remembered the smile on their faces and the sparkles in their eyes when I presented them these simple gifts. Since then, I had been wanting to make them but somehow, never got around it....

2 years ago, I was presented with another sugar cookie. This time was from my lady boss. She gave away these lovely cookies that come as little cute overall, milk bottle and pacifiers as her son full moon celebration "cake" (in Chinese cultural, we celebrate baby's 1 month old birthday, and gives away cakes or cookies as favours). Once again, I told myself.... I really need to make these cute, little thing!

Now after 7 years since my first encounter (7 years itch must be working it's positive magic this time).... I finally got around making my "Sweethearts". I really had a lot lot of fun with them. The baked sugar cookies are like a blank canvas. I can literally decorate them with anything!! The sky is the limit here.  

I also realized the biggest satisfaction of all with these cookies is the happiness they bring. My princesses felt it when I gave them the "sunflower", my colleague & I felt it when we got them from my boss. My friends felt it, when they got them from me. Go on.... put a smile on someone's face and see their eyes sparkle.........Spread the Sweet Heart around :)
Cooling baked cookies


Iced and letting dry before the next color
Sweet Hearts


Sugar Cookies
3 cups (390 grams) all purpose flour
1/2 teaspoon salt
1 teaspoon baking soda
1 cup (227 grams) unsalted butter, room temperature
1 cup (200 grams) granulated white sugar
2 large eggs
2 teaspoons pure vanilla extract

Royal Icing:
2 large egg whites
2 teaspoons fresh lemon juice
3 cups (330 grams) confectioners (powdered or icing) sugar, sifted

Sugar cookies prep

In a  bowl whisk together the flour, salt, and baking soda. 

In your electric mixer bowl  (or with a hand mixer), beat the butter and sugar until light and fluffy (about 3 to 4 minutes). Add the eggs and vanilla extract and beat until combined. 

Mix in flour mixture and beat until you have a smooth dough.

Divide the dough in half and wrap each half in plastic wrap. Refrigerate for about one hour or until firm enough to roll.
Preheat oven to 350 degrees F (177 degrees C) and place rack in center of oven. Line two baking sheets with parchment paper.  

Remove one half of the chilled dough from the refrigerator and, on a lightly floured surface, roll out the dough to a thickness of 1/4 inch (1 cm). (Keep turning the dough as you roll, making sure the dough does not stick to the counter.)  

Cut out desired shapes using a lightly floured cookie cutter (I used heart shape here) and transfer cookies to the prepared baking sheet. Place the baking sheets with the unbaked cookies in the refrigerator for 10 to 15 minutes to chill the dough which prevents the cookies from spreading and losing their shape while baking.

Note: If you are not going to frost the baked cookies, you may want to sprinkle the unbaked cookies with crystal or sparkling sugar.  

Bake cookies for about 8 - 10 minutes (depending on size) or until the edges are just starting to brown. Remove from oven and let cookies cool on baking sheet for a few minutes before transferring to a wire rack to finish cooling. 

Makes about 36 - 4 inch (10 cm) cookies.

Royal Icing Prep
In the bowl of your electric mixer (or with a hand mixer), beat the egg whites with the lemon juice.

Add the sifted powdered sugar and beat on low speed until combined and smooth.

The icing needs to be used immediately or transferred to an airtight container as royal icing hardens when exposed to air. Cover with plastic wrap when not in use.

Add different colour to the icing to for your decoration. Add colouring a little droplet at a time to get the hue you desired. 

Tips:
  • Be sure the cookies are really cool down before decorate with royal icing. Otherwise the royal icing with run
  • Be sure to let the royal icing dry completely before storing. (This may take several hours.)
  • Frosted cookies will keep several days in an airtight container. Store between layers of parchment paper or wax paper.
  • If the royal icing is too runny, add more confectioner sugar, if it's too thick, add more water (droplets at a time) 
  • The icing needs to be used immediately or transferred to an airtight container as royal icing hardens when exposed to air. Cover with plastic wrap when not in use.

(recipe from Joyofbaking.com)